The Best Espresso Machines for Oat Milk and Other Plant Milks
Oat, soy and almond milk don't foam like dairy, and a machine that makes beautiful dairy microfoam can still give you a thin, splitting mess with a plant-based carton. Here's why that happens, which frothing hardware handles it better, and which of our four machines make the most sense if plant milk is the only milk in your fridge.
Reader-supported: we may earn a commission if you buy through our links, at no extra cost to you. Prices below are what we recorded in late September 2026 and they move constantly — confirm the live price before buying.
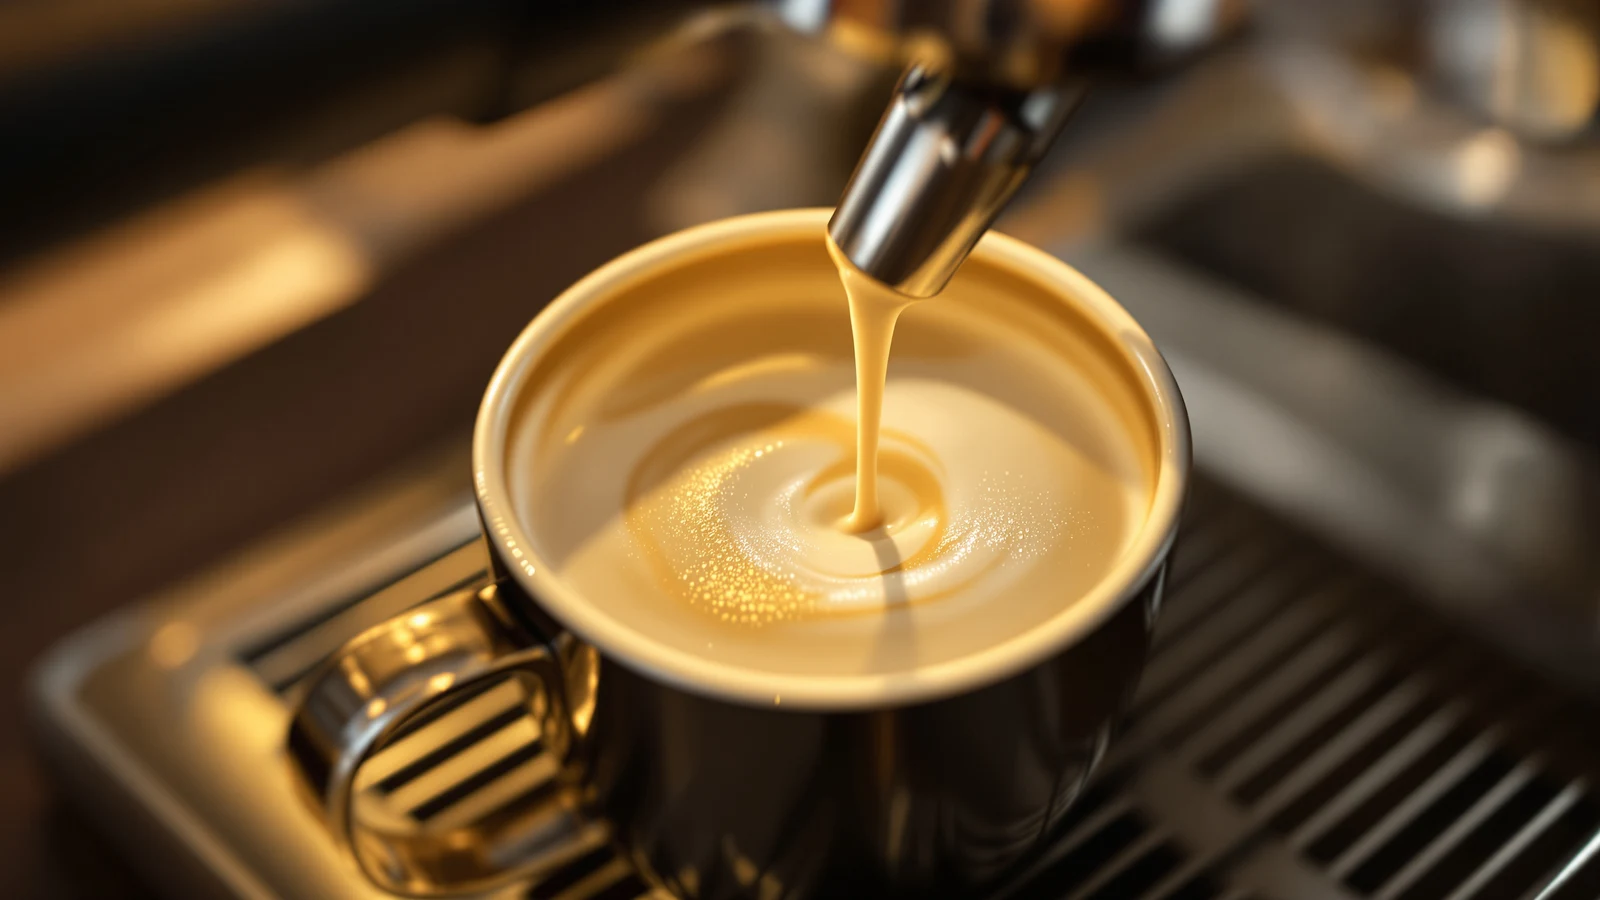
Why oat and soy milk foam differently than dairy
Dairy milk foams well for a specific, mechanical reason: it's built out of casein micelles, small stable clusters of protein that unfold under heat and steam pressure and trap air in a fine, even lattice. Whip air into hot dairy and the protein web holds it there, which is why a properly steamed pitcher of whole milk turns into a glossy, wet-paint microfoam that pours into hearts and rosettas without collapsing.
Plant milks don't have casein. Oat milk's protein comes mostly from the oats themselves plus whatever the manufacturer added back in, and it's a fraction of dairy's protein content — often less than half, depending on the brand. Soy milk is the closest plant-based match on paper, since soy protein is relatively abundant, but it still bubbles up bigger and looser than dairy's fine, tight microfoam. Almond milk has the least protein of the three and is generally hardest to texture well.
Fat content is the second variable, and it cuts the opposite way from what people expect. A little fat helps foam feel silky and stabilizes the bubbles once formed; whole dairy milk sits in a fat sweet spot that works in the machine's favor. Most plant milks are lower in fat, and some oat and almond milks are fat-free, leaving the foam with less to hold it together once you stop steaming.
That gap is what "barista" or "barista blend" plant milks are formulated to close — generally a small amount of added oil and sometimes a stabilizer, specifically so the milk foams and holds at espresso-shop temperatures instead of splitting. If plant milk in a latte has given you a watery, separated mess, the first thing worth changing is the carton, not the machine: a standard "original" oat milk built for cereal is a different product from a barista-formulated one, even from the same brand.
None of this is a claim about any specific machine in our lineup — it's general dairy-science background that applies no matter which wand or frother you're using. It explains why the same machine can make a beautiful dairy latte and a disappointing oat one: the milk does less of the work, so hardware and technique have to make up the difference.
Steam wand versus panarello: which handles plant milk better
Milk steaming attachments on home machines generally fall into two families. A bare steam wand is a thin metal tube with one or more small tip holes; you control texture yourself by how deep you submerge the tip and how much air you introduce before plunging it under the surface. A panarello is a wand with an outer sleeve that draws air in automatically through a small vent, so it froths with less technique — you mostly just hold the pitcher in roughly the right spot and let the attachment do the aerating.
For plant milk, the bare wand generally has the edge, and the reason comes straight from the protein-and-fat problem above. Because plant milks form a weaker, less stable foam structure than dairy, they're more sensitive to over-aeration — pull in too much air too fast, as a panarello's automatic aeration tends to do, and you get large, loose bubbles that separate from the liquid milk within a minute rather than a fine microfoam that holds its texture into the cup. A bare wand lets you control the aeration phase precisely: a short, deliberate stretch at the start, then a clean roll with no more air added, which is closer to what plant milk's thinner structure can actually support.
The trade-off is real: a bare wand takes practice, and a beginner is more likely to end up with a flat, unaerated pour than an over-foamed one. A panarello is more forgiving on dairy because dairy's protein web absorbs a wider margin of error — forgiveness that works against you on a thinner plant milk, where the attachment's fixed aeration ratio can't adjust to the milk you've swapped in.
None of the four machines here state whether their milk frother is a bare wand or a panarello-style sleeve — the listings just say "milk frother," which is common at this end of the market. Before you buy, check the product photos: a wand with no visible outer sleeve is almost always manual, one with a plastic or metal collar around the tip is usually a panarello.
Temperature control: why plant milk scalds and separates faster
Dairy milk has a fairly wide margin of safety when you're steaming it. You can run it past the point flavor starts to suffer — scalded dairy tastes flat and slightly sweet-burnt — without the milk physically falling apart. Plant milks don't get that same cushion, because the proteins and starches that give them structure are more heat-sensitive than casein. Push oat or almond milk too hot, and rather than just tasting worse, it can visibly split: the liquid separates into a thin, watery layer with clumps of protein floating in it, which is unusable for a latte no matter how good your pour is.
Soy milk is particularly prone to this because soy protein can curdle in the presence of acidity — and espresso itself is acidic. Over-steamed soy foam poured into a shot can curdle visibly even if it looked fine in the pitcher. Timing the pour and keeping the milk toward the lower end of a safe range both reduce the risk.
That's why temperature control matters more with plant milk than with dairy. A machine with an adjustable setting — the SHARDOR Espresso Machine below lists this as a touchscreen feature — lets you dial the boiler down for milk drinks rather than steaming blind at a fixed default. Machines without adjustable temperature aren't unusable for plant milk; they just put more responsibility on you to pull the pitcher off the wand earlier. A cheap instant-read thermometer clipped to the pitcher removes most of the guesswork either way, and it's the easiest fix for splitting milk regardless of which machine you own.
General guidance across specialty coffee, independent of any product here, is to stop steaming plant milk noticeably earlier than you would dairy. Treat that as a starting habit to adjust from, since it varies by milk brand and fat content.
The picks
We're not naming an outright "best for oat milk" winner, since none of these listings specify the one spec that would settle it — bare wand versus panarello. Instead we've sorted the four by what does matter for plant milk: temperature control, pump pressure, and how much heating power sits behind the boiler.
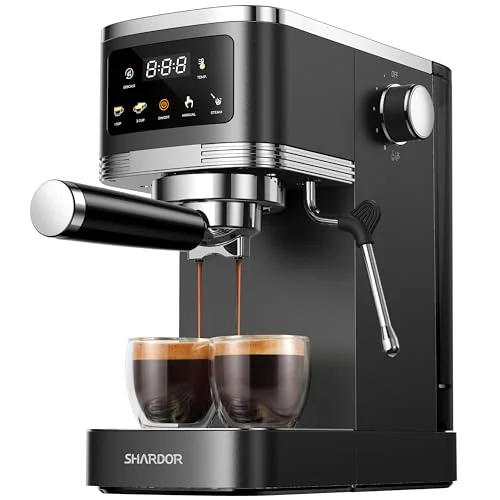
SHARDOR Espresso Machine 20 Bar, with Milk Frother and Touchscreen
The one machine here that lists adjustable temperature control as a named feature, run through a touchscreen rather than a dial. Pairs with a 20-bar pump and a milk frother; the listing doesn't specify wand type, so check the product photos if bare-wand control matters to you. A medium-size footprint, stainless steel and black finish.
$119.99 Check price →Reach for the SHARDOR first if temperature is the variable you most want to control directly — it's the only one of the four that advertises adjustable temperature rather than a fixed factory setting, which matters given the scalding and separation problem above.
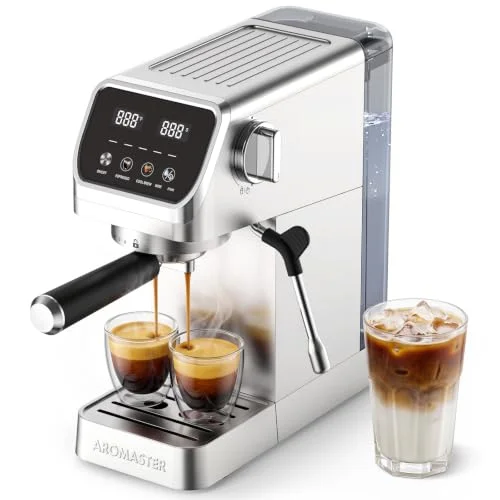
Aromaster 1400W Espresso Machine with Milk Frother
The most heating power of the four at 1,400W, in a full household-size stainless steel body with a milk frother. More wattage generally means the boiler recovers faster between a brew cycle and a steam cycle, which matters if you're pulling a shot and steaming milk back to back rather than one at a time.
$182.99 Check price →Pick the Aromaster if your household makes more than one milk drink in a row: its 1,400W element is the highest wattage here, which shortens boiler recovery between a shot and a steam cycle — useful when plant milk's narrower error window means you don't want to rush a half-heated wand. It's also the largest and priciest of the four.
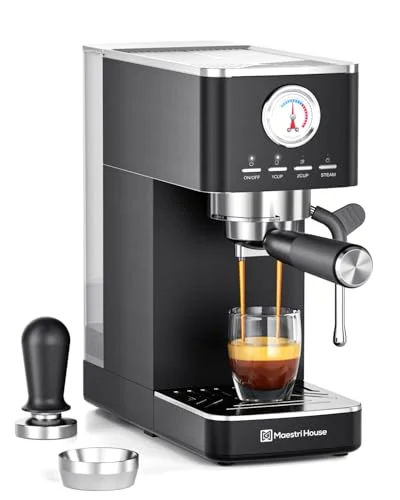
Maestri House Slim Espresso Machine with Milk Frother, 20 Bar Italian Pump
A 1.3 L slim-profile machine built around a 20-bar Italian pump, with a milk frother included. The slim body is the main selling point if counter width is tight — it's built to sit in a narrower footprint than a standard household machine without giving up a frother.
$139.99 Check price →The Maestri House is the pick for a tight counter, since slim-plus-frother is a hard combination to find at this price. It doesn't list adjustable temperature, so lean on technique — pull the pitcher a little earlier than you would for dairy.
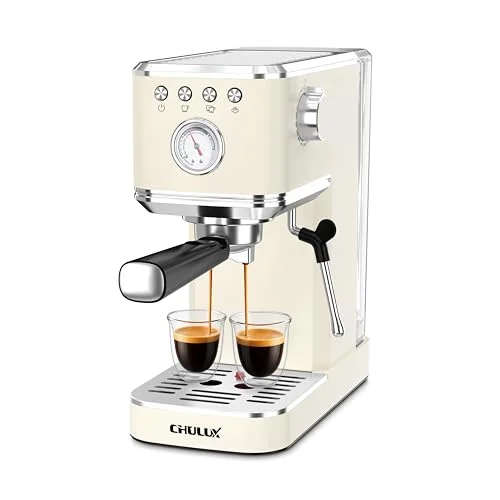
CHULUX Slim Espresso Machine with Milk Frother
The lowest price of the four, also built in a slim profile, with a milk frother included for cappuccino and latte drinks. The listing doesn't specify pump pressure, wattage or adjustable temperature, so treat it as the budget entry point rather than the spec leader.
$109.99 Check price →The CHULUX is the pick if you want to find out whether plant-milk espresso is a habit worth keeping before spending more — cheapest of the four, with fewer stated specs, so expect to manage temperature and aeration by feel rather than by machine features.
Getting a usable microfoam from a basic wand, step by step
This sequence assumes a bare or lightly-assisted steam wand and a barista-formulated plant milk — an "original" carton built for pouring over cereal will fight you at every step below, so start with a barista blend if your store carries one.
- Chill the milk and the pitcher. Cold milk and a cold metal pitcher both buy you more time before the plant proteins start to break down.
- Purge the wand first. A short burst of steam into a cloth clears condensed water that would otherwise dilute the milk and thin the foam.
- Submerge the tip just under the surface and stretch briefly. Keep this short and controlled — a few seconds of light hissing, not a sustained roar. Over-aerating here is the most common way to get big, unstable bubbles that won't hold.
- Drop the tip deeper and roll the milk. Once you've introduced enough air, go deeper to stop adding more and create a whirlpool that folds the foam into the liquid for a smooth, glossy texture.
- Watch temperature, not just time. On a machine with adjustable temperature, like the SHARDOR above, set it conservatively. Otherwise use a thermometer or judge by touch — pull the pitcher well before the point dairy milk is typically steamed to.
- Swirl and tap immediately. Even out the texture and tap the pitcher on the counter to pop large surface bubbles — plant-milk foam holds onto them longer than dairy does.
- Pour right away. Plant milk foam separates faster than dairy foam. Pull the shot first if you can, so the milk is the last thing you touch before pouring.
When an automatic frother is the safer bet for plant milk
Everything above assumes you're willing to learn wand technique, which takes real practice and a few wasted cartons along the way. If that's not the trade you want, an automatic milk frother — a separate pitcher-style device that heats and whisks milk to a fixed program rather than a manual wand — removes most of the variables that trip plant milk up.
The case for automatic over manual gets stronger, not weaker, with plant milk specifically: a beginner's mistakes on a manual wand show up more visibly on plant milk — as separation and thin, watery foam — than on dairy, where the same mistakes just mean less impressive foam rather than a failed drink. An automatic frother's fixed program isn't tuned for plant milk either, but it removes the timing and aeration judgment calls that are hardest to get right under time pressure.
None of the four machines here are automatic-frother models in the countertop-pitcher sense — all four use an attached frother on the machine itself. A set-and-forget automatic pitcher is a different product category, worth treating as a separate purchase alongside whichever of these four you pick. The closest any of them come to taking a variable off your plate is the SHARDOR's adjustable temperature.
How the four compare
Prices are what we recorded in late September 2026.
| Machine | Best for | Pressure | Notable spec | Price | |
|---|---|---|---|---|---|
| SHARDOR 20 Bar with Touchscreen | Temperature control | 20 bar | Adjustable temperature, touchscreen | $119.99 | Price |
| Aromaster 1400W | Back-to-back drinks | Not stated | 1,400W heating element | $182.99 | Price |
| Maestri House Slim | Tight counters | 20 bar | 1.3L, slim profile | $139.99 | Price |
| CHULUX Slim | Budget entry | Not stated | Slim profile, lowest price | $109.99 | Price |
How we compared these
We compare published specifications, what's described in the listing, and live pricing — we do not physically test these machines, we do not run a testing lab, and we do not publish ratings we cannot verify. None of these four products currently carry a rating or review count we can confirm, so there are no stars anywhere on this page, and we haven't paraphrased review sentiment we don't have access to.
Where a listing is silent on a spec — wand type on all four, pressure on two of them — we've said so rather than guessing, and pointed you toward the product photos as the way to confirm it yourself before buying. The plant-milk science in this guide (protein and fat differences between dairy, oat, soy and almond milk; how barista blends are formulated; why plant proteins are more heat-sensitive than casein) is general, widely documented background on dairy chemistry and milk steaming, not a claim about any product listed here.
If boiler recovery and heating power matter to your routine — which they do more, not less, with plant milk's narrower margin for error — our guide to wattage and circuit draw explains what the number on the box buys you on a shared kitchen circuit. If you'd rather brew and steam at the same time, double boiler versus single boiler is the more relevant trade-off.
None of the four machines here are the 58mm semi-commercial class covered in our guide to that segment; their maintenance is lighter to match, though a frother that isn't purged after every use is still a fast route to a stale-milk smell — see self-clean and auto-descale cycles. If $120–$183 isn't your ceiling, our guide to machines at $1,000 and up is where dual boilers and PID-controlled steam typically start to appear.
Frequently asked questions
Does oat milk foam as well as dairy milk in an espresso machine?
Not by default. Dairy's casein protein forms a stable foam structure that plant proteins don't match, and most oat milks also carry less fat than whole dairy milk, which is part of what stabilizes foam once it's formed. A barista-formulated oat milk, built with added oil specifically to foam and hold better, closes most of that gap; a standard "original" oat milk built for pouring over cereal usually won't foam well no matter how good the machine is.
Should I get a steam wand or an automatic milk frother for plant milk?
A bare steam wand generally gives better results on plant milk once you've learned the technique, because it lets you control aeration precisely — plant milk's weaker foam structure is more sensitive to over-aerating than dairy is. An automatic frother is the safer choice if you'd rather not spend weeks practicing, since it removes the timing and aeration judgment calls, even though its fixed program isn't tuned specifically for plant milk either.
Why does my oat or soy milk curdle or split when I steam it?
Plant proteins are more heat-sensitive than dairy's casein, so pushing the milk too hot can cause visible separation — a thin, watery layer with clumps floating in it. Soy milk has an added risk because soy protein can curdle on contact with the acidity in espresso itself, which can show up in the cup even if the steamed milk looked fine in the pitcher. Stopping earlier than you would for dairy, and using a barista-formulated milk, both reduce the risk.
What temperature should I steam plant milk to?
General guidance in specialty coffee is to stop noticeably earlier than you would for dairy, since plant proteins and starches lose structure at lower temperatures than casein does. The exact point varies by milk brand and fat content, so a cheap instant-read thermometer clipped to the pitcher removes most of the guesswork; on a machine with adjustable temperature, like the SHARDOR in this guide, you can also dial the boiler itself down before you start.