How to Froth Milk at Home (and Why Yours Goes Flat)
Good microfoam is not a talent. It is two short mechanical phases, a temperature window of about twenty degrees, and a habit of stopping on time instead of by guesswork. Get those three things right and a $63 steam wand does the same job as one on a $700 machine — just slower.
Reader-supported: we may earn a commission if you buy through our links, at no extra cost to you. Prices move constantly on Amazon — confirm the live price before buying.

What microfoam actually is
Microfoam is milk with air worked into it so finely that you cannot see individual bubbles — the surface looks like wet paint, and the foam pours instead of scooping. That texture comes from a specific structure: steam injects air into the milk, and the milk's proteins (mainly casein and whey) unfold and wrap around each air pocket, while the fat helps stabilize the resulting film. The smaller and more uniform those pockets are, the glossier and more pourable the foam.
Big, dry, cappuccino-machine-at-a-gas-station bubbles are the same ingredients gone wrong: air was added faster than it was broken down, so you end up with a meringue-like cap sitting on thin milk underneath instead of one integrated liquid. Once bubbles are that large, stirring will not save them — they have to be avoided in the first two phases, not fixed afterward.
This is also why microfoam and "foam" are not the same target. A cappuccino needs a thicker foam cap than a latte, but both should come from the same integrated texture — the difference is how much air you introduce in the first few seconds, not a different technique.
Before you turn the steam on
Cold milk holds air better than warm milk, so start with milk straight from the refrigerator, in a stainless steel pitcher chilled if possible, filled to roughly a third of its height — milk expands as it froths, and a pitcher that starts too full has nowhere for that volume to go. A tapered pitcher with a pointed spout also makes it far easier to see and control the vortex you're about to create.
Purge the wand for a second before it goes into the milk. Steam wands hold a little condensed water in the tip between uses, and injecting that water into your milk is a small, avoidable annoyance and a habit that also matters for wand health, which we come back to in the cleaning section below.
Phase one: stretching
Stretching is the aeration phase, and it happens first and only at the start. Submerge the tip just under the surface, angled slightly off-center so the milk spins rather than just bubbling in place, and open the steam valve fully. Held correctly, the tip sits right at the surface — shallow enough that you hear a rhythmic hissing or a "tearing paper" sound as it pulls air in, not a loud spitting or splashing sound, which means the tip has broken the surface too aggressively.
The job in this phase is simple: let the pitcher's volume grow by roughly a third to a half while the milk is still cold, then stop introducing air. For a standard 8–12 oz home pitcher that's usually three to five seconds — a small, precise window, which is exactly why so many people either add nothing (flat milk, no foam at all) or way too much (a stiff, dry cap). Time it by sound rather than a clock: as the hissing gets quieter and the pitch of the swirling milk drops slightly, that's your cue to move into the next phase.
Phase two: texturing
Once you've added the air you want, lower the pitcher slightly so the tip sits deeper below the surface — enough that the hissing stops entirely and you're left with a smooth, spinning vortex and no more surface aeration. This is the texturing phase, and its only job is to break down whatever bubbles you created in phase one into microfoam while heating the milk evenly.
Keep the milk spinning in a tight, controlled whirlpool for the rest of the process. A vortex does two things at once: it distributes heat evenly so you don't scorch the milk near the tip while the rest stays cold, and it physically shears larger bubbles apart against the sides of the pitcher, which is the mechanical step that turns "foam" into "microfoam." If the surface looks glossy and the pitcher feels like it's spinning a single connected liquid rather than a foam cap floating on milk, you're doing it correctly.
Texturing continues until the temperature target below is reached — it is not a fixed number of seconds, because pitcher size, milk volume and your machine's steam pressure all change how fast that happens.
Temperature: where to stop, and how to feel it
The generally accepted target for steamed milk is roughly 150–155°F (65–68°C). That range is where milk's natural sugars read as sweetest to most palates, and it's comfortably below the point where milk proteins start to break down and produce a cooked, slightly sulfurous taste — a change that becomes noticeable above about 170°F (77°C) and is the reason "over-steamed" milk tastes flat and heavy rather than sweet, regardless of how good the foam texture looks.
If you have an instant-read thermometer, clip it to the pitcher and pull the wand at 150–155°F — this is the most reliable method and worth using while you're learning. If you don't, the standard hand test works: hold your palm flat against the outside of the pitcher. When the pitcher goes from comfortably warm to genuinely too hot to keep your hand on for more than a couple of seconds, you're in the right window — stop within about three to five seconds of that point, because the temperature keeps climbing for a moment even after you close the steam valve.
Both methods fail the same way if you're distracted: temperature climbs faster than it feels like it should in the last ten seconds, because you're heating a shrinking volume of liquid with the same amount of steam. Pull the wand a beat earlier than instinct says, especially with a smaller pitcher.
Milk choice, honestly
Whole milk (around 3.25% fat) is the easiest milk to froth well and the most forgiving of small technique errors. The fat coats the air bubbles and slows them from collapsing back into each other, so whole-milk microfoam holds its texture longer on the counter and blends more smoothly into espresso instead of separating. If you're learning the technique above, start with whole milk — it gives you the widest margin for error while your timing improves.
Lower-fat and skim milk froth to a larger volume for the same steaming time, because there's proportionally more protein relative to fat to trap air — but that foam is less stable. It dries out and separates faster once poured, and it's easier to over-aerate into big bubbles because there's less fat to slow the process down. Reduced-fat milks aren't wrong, they just reward slightly gentler stretching and a slightly shorter aeration phase.
Plant milks are a genuinely different case, and the honest answer is that they don't all behave the same way. Milks marketed specifically as "barista" blends are formulated with added stabilizers and a fat ratio designed to mimic dairy's foaming behavior, and they generally steam predictably. Standard, non-barista oat, almond, and rice milks were formulated for drinking cold or in cereal, not for heating under pressure — they can split, curdle, or refuse to hold any foam structure at all, and no amount of technique fixes a milk that lacks the protein or stabilizers to trap air in the first place. Soy milk tends to sit in between: it has more protein than most nut milks, which generally makes it froth closer to dairy. If a plant milk is fighting you, the fix is usually the product, not your wand angle.
Why yours goes flat
Three mistakes account for almost every disappointing pitcher of milk, and all three trace back to the two phases above.
No foam at all. The tip was submerged too deep from the start, so the milk heated without ever aerating. If you never hear the hissing sound described in the stretching phase, you skipped aeration entirely — the milk gets hot but stays flat.
Big, dry bubbles instead of microfoam. The opposite problem: aeration ran too long, or continued into the texturing phase instead of stopping once volume grew by a third to a half. Once bubbles are large, the texturing phase can smooth them somewhat but cannot fully re-integrate them — which is why the stretching window matters more than most guides admit.
Foam that separates a minute after pouring. Usually a temperature or fat problem, not a technique problem: milk over-steamed past roughly 160°F breaks down proteins that were holding the structure together, and skim or reduced-fat milk separates faster than whole milk even steamed correctly, for the reasons in the section above. If your foam looks right in the pitcher but collapses by the time it hits the cup, check the thermometer before you blame your pour.
The picks
You don't need an expensive machine to get microfoam — you need a steam wand and the two phases above. These three cover a wide budget range and each pairs a pump machine with a way to froth milk, from a $63 entry point to a $300 automatic system.
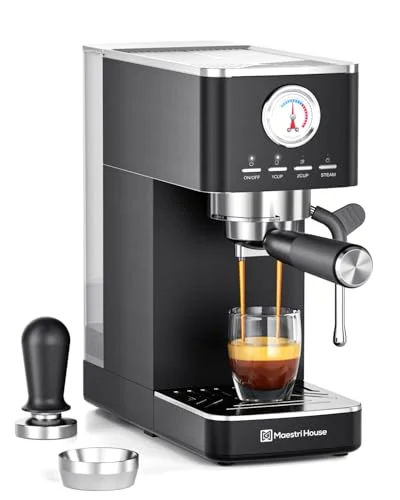
Maestri House Slim Espresso Machine with Milk Frother
A slim-footprint machine built around a 20-bar Italian pump with a milk frother and a 1.3 L water tank — the lowest-cost way into the two-phase technique above, and a reasonable place to practice on whole milk before spending more.
$59.84 Check price →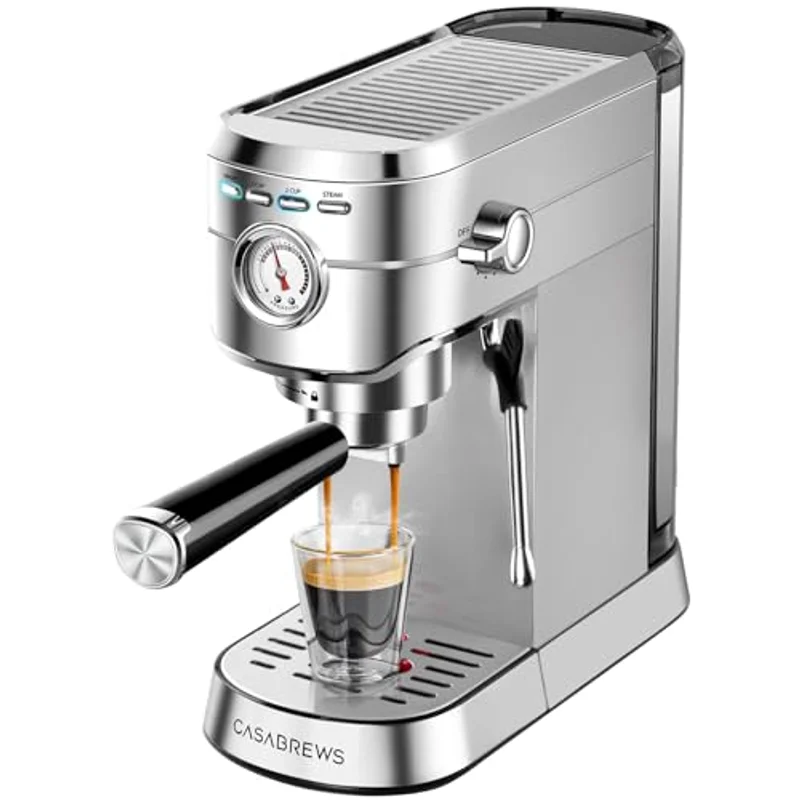
CASABREWS CM5418 Compact Espresso Machine
A small-footprint pump machine with a dedicated milk-frothing steam wand, which gives you the manual control the stretching and texturing phases actually need — angle, depth and timing are entirely in your hands, which is exactly what you want while you're building the technique.
$118.99 Check price →
Breville BES450BSS Bambino
The Bambino automates the milk side with a steam wand that textures to a set temperature and stops on its own, which removes the timing judgment this guide walks through and hands it to the machine — useful if you want the two-phase result on a weekday morning without watching a thermometer.
$299.95 Check price →None of these three is a "better" or "worse" pick in a general sense — the Maestri House and CASABREWS put every part of the stretch-and-texture technique in your hands at a low entry price, which is genuinely the fastest way to learn it, while the Bambino trades that manual control for consistency once you'd rather not think about it each morning. If you're weighing a full machine purchase around milk drinks specifically, our guide to espresso machines with milk frothers goes deeper on the tradeoffs between manual wands and automatic systems, and our beginner picks cover the wider machine, not just the wand.
Cleaning the wand before it costs you a shot
Milk left inside a steam wand does two things, and both get worse the longer you ignore them. Externally, milk residue dries within minutes into a crust that's genuinely difficult to scrub off once it's set, and it happens fast enough that "I'll wipe it after this next cup" usually means wiping dried residue instead of fresh liquid. Internally, milk drawn back up into the wand's tip during steaming — a small amount happens on almost every machine — dries inside the channel, narrows it, and gradually chokes the steam flow, which is a mechanical problem, not a taste one.
The fix is two habits, both under ten seconds. First, purge the wand into a cloth or a dedicated cup for a second immediately before steaming, which clears any water or old residue sitting in the tip. Second, and more important, purge again immediately after steaming, before any milk has a chance to dry, and then wipe the outside of the wand with a damp cloth while it's still warm and residue is still soft. Skip the second purge a few times in a row and the holes in the tip start to clog — froth gets weaker and less consistent for reasons that have nothing to do with your technique, and by the time it's obviously blocked you're looking at a soak in a wand-cleaning solution or a physical disassembly rather than a wipe.
Wand care and machine descaling are related but separate jobs — a clean wand keeps milk out of the equation, while scale buildup in the boiler is a water-hardness problem that affects the whole machine, including how steam is generated in the first place. If you haven't looked at your machine's descaling schedule, our water quality and descaling guide covers how often and why it matters more than most owners assume.
How we compared these
The technique above is drawn from how steam wands physically work and from widely documented dairy science — protein structure, fat's role in foam stability, and the temperature range at which milk's natural sweetness is most noticeable before proteins begin to denature. None of it depends on any single product, and it applies whether you're using an entry machine or one that costs ten times as much.
We do not physically test these machines, we do not run a testing lab, and we do not publish ratings we cannot verify: Amazon's product data returns no rating and no review count for the machines on this site, so there are no stars and no invented scores anywhere on this page. The three products named above are described only by the specifications published for them — pump pressure, frother or wand type, tank size and price — and nothing else. Prices shown are current at time of writing and move constantly on Amazon; confirm the live price before buying. For the wider buying decision behind any of these machines, our buying guide and our main espresso machine guide cover the rest of the specs that matter.
Frequently asked questions
What is microfoam, exactly?
Microfoam is milk with air integrated so finely that individual bubbles aren't visible — the surface looks glossy, like wet paint, and it pours rather than scoops. It forms when milk proteins wrap around tiny air pockets during steaming while fat helps stabilize the structure, which is different from large, dry bubbles sitting on top of unaerated milk.
Why does my milk turn into big bubbles instead of microfoam?
Almost always because aeration ran too long or continued past the point it should have stopped. Air should only be introduced during the first few seconds — the stretching phase — while the pitcher's volume grows by roughly a third to a half. Once bubbles are that large, the texturing phase that follows can smooth them somewhat but can't fully re-integrate them.
What temperature should milk be steamed to?
Roughly 150–155°F (65–68°C), which is where milk tastes sweetest before proteins start to break down. Past about 170°F (77°C) the milk takes on a cooked, flat taste regardless of how good the foam texture looks. Without a thermometer, stop a few seconds after the pitcher becomes too hot to comfortably hold your palm against.
Does the type of milk matter for frothing?
Yes. Whole milk is the most forgiving because its fat content stabilizes the foam, while skim and reduced-fat milk froth to a larger volume but separate faster. Plant milks vary widely — "barista" blends are formulated to froth like dairy, while standard oat, almond or rice milk can split or refuse to hold foam at all, regardless of technique.